
Alabama Chanin style MOH DRESS
I have been enamored with Alabama Chanin hand embellishment techniques since before I began sewing, and my sister’s wedding seemed like the perfect excuse to make something a little, well… extra. Linda picked a muted palette of bronze hues and neutrals for her bridesmaids and allowed us all to pick our own dresses (tbh tere was no way she was getting me into a matchy-matchy rtw bridesmaid gown anyway so it was a wise decision).
For those unfamiliar with Alabama Chanin, the basic idea is to create motifs by stitching together two pieces of non-stretch cotton jersey — a top layer with a printed/air-brushed design, and a plain bottom layer — and then cutting out pieces from the top layer to expose the bottom layer. It creates beautiful, subtle texture and elegant designs.
For my dress, I wanted something dramatic but modern, wearable but formal. Despite my sister’s (many) misgivings, I decided a separate top and ballgown skirt would be right for a number of reasons — I mean, y’all know I love a good crop top and anything with an elastic waist, and I figured it would allow me to repurpose the pieces after the wedding (seriously, I can’t wait to pair the top with distressed jeans and clogs for a night out on the town…).
So, I decided to make a simple gathered skirt with an elastic back out of silk charmeuse, and for continuity, use the same silk charmeuse as the base layer for the embroidered top.
Basic supply list:
Silk charmeuse in “Cornstalk” from Mood (skirt & top)
Silk organza in “Cornstalk” from Mood (lining for the skirt)
100% organic medium-weight cotton jersey from Alabama Chanin in “Doeskin,” color now discontinued (top)
Elastic (for the skirt), thread, and invisible zipper (for the top)
And for the embellishment on the top:
Textile paint in “White Gold”, bead mix in “Gold Bomb,” and button craft thread in “Dogwood,” all from Alabama Chanin
Airbush kit with 3 guns because apparently I cannot do any craft without going ALL TF IN
The top was almost entirely self-drafted, and I am EXTREMELY PROUD. I had never done princess seams before, but I wanted it to be relatively fitted and bust darts don’t work with the kinds of embellishments I had planned.
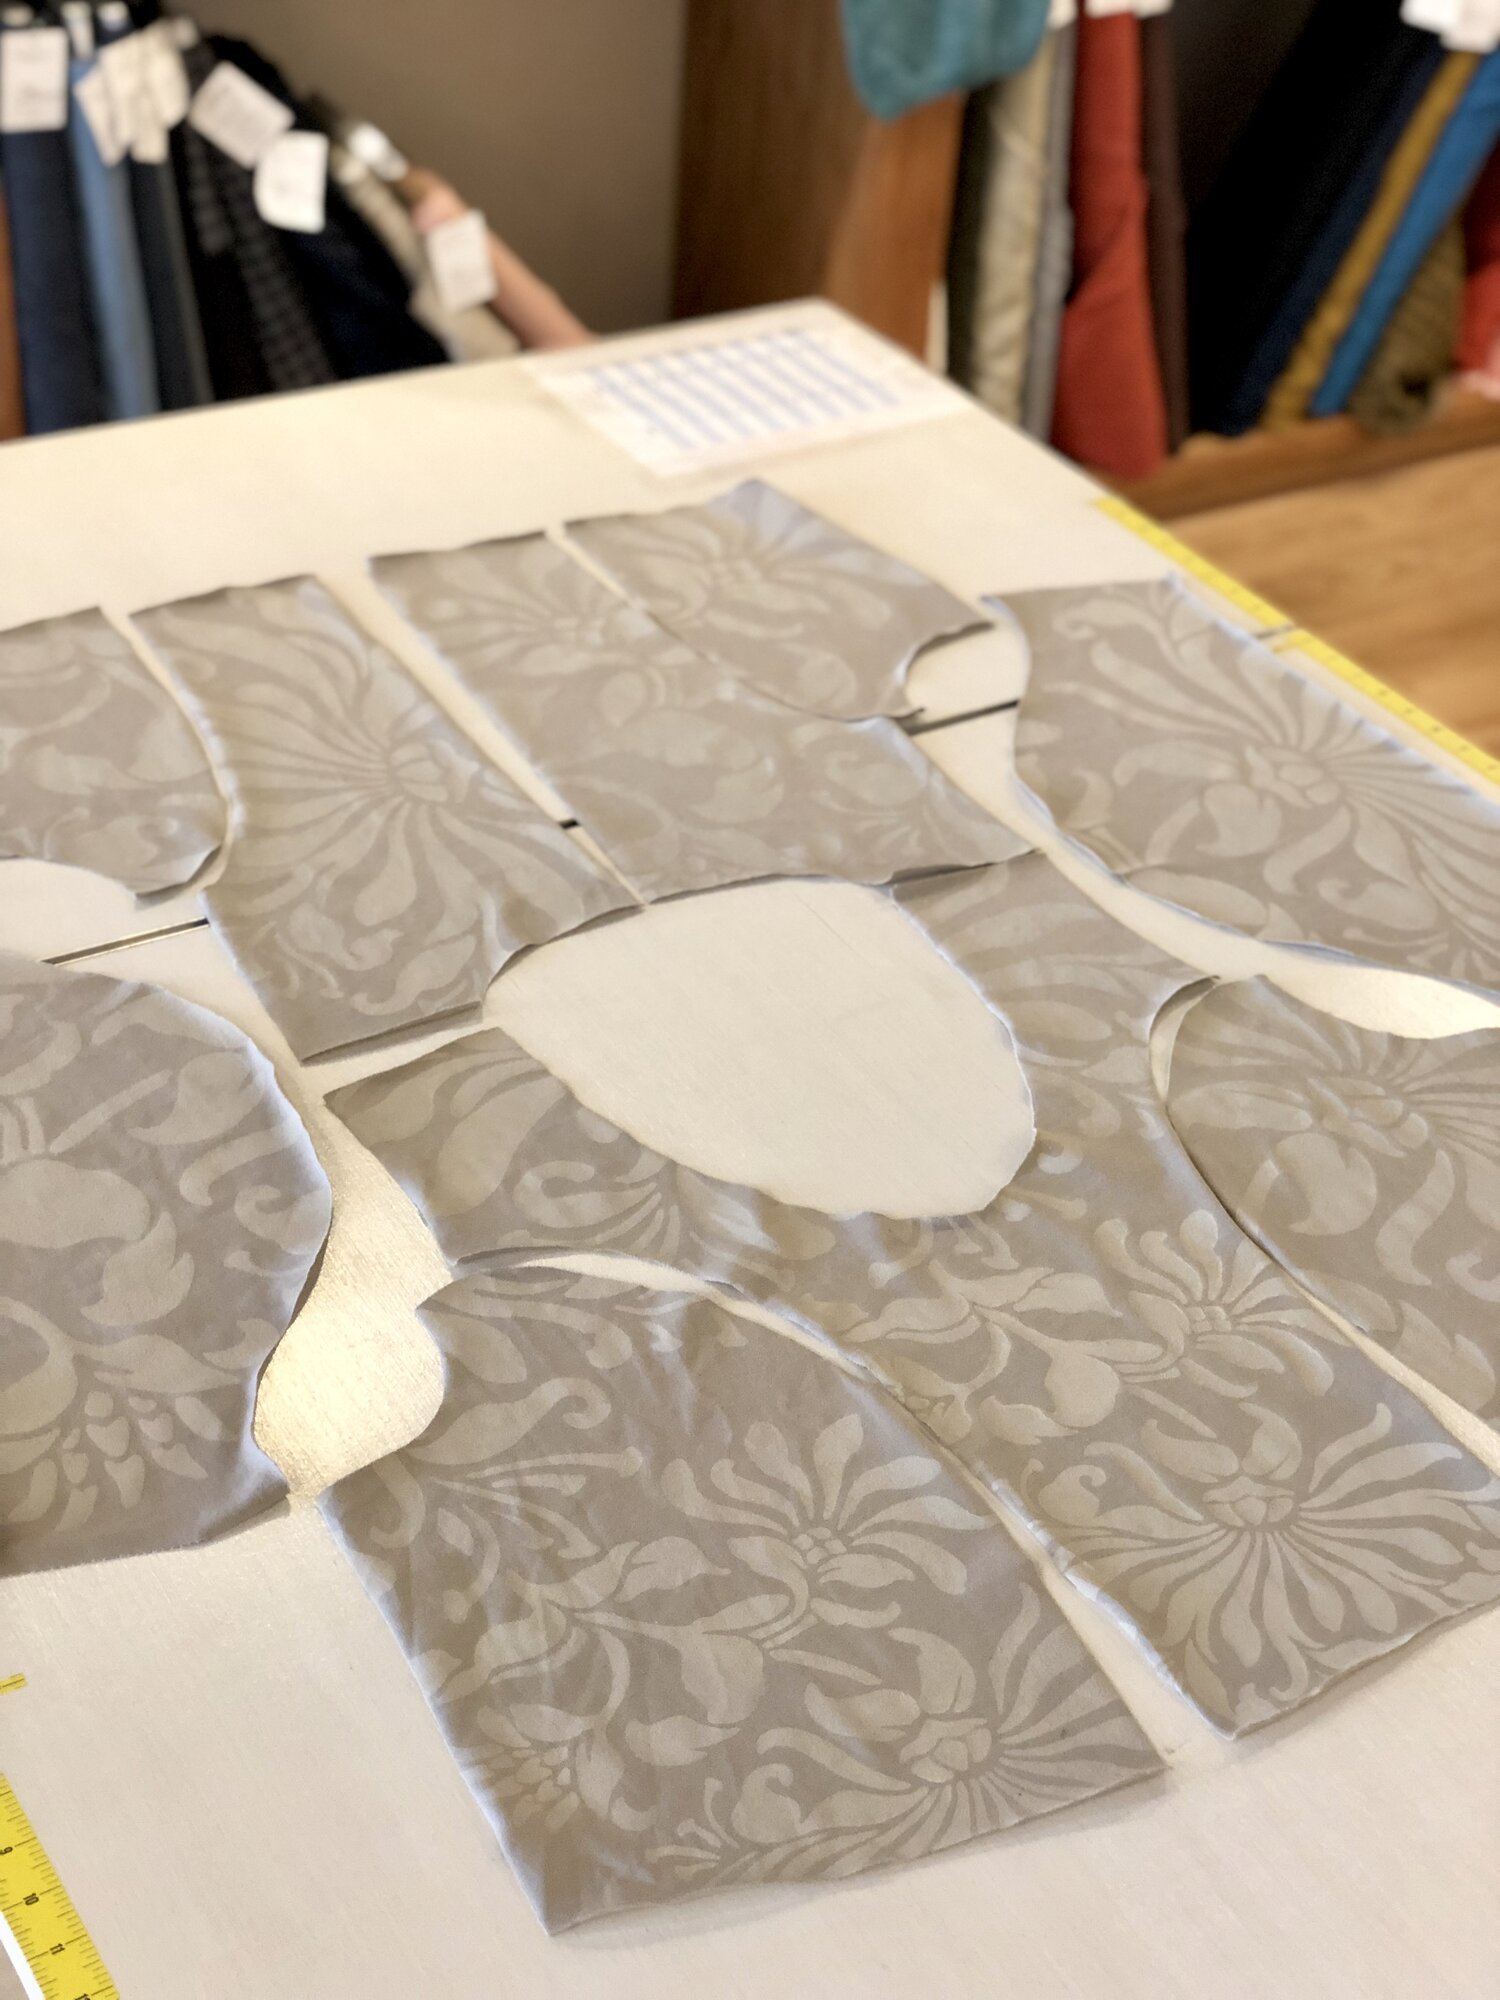
After the top was drafted and the pieces cut from the cotton jersey, I used the Magdalena stencil to airbrush designs onto each piece of the top, following instructions from the Alabama Chanin blog here. I then used the spray adhesive to attach the jersey pieces to the silk charmeuse and cut out each piece again. I serged around the edges of each piece of the top before sewing them all together, both to more securely hold the silk and jersey together and to prevent the edges of the silk from fraying. You can see the serged edges in the in-progress picture below.

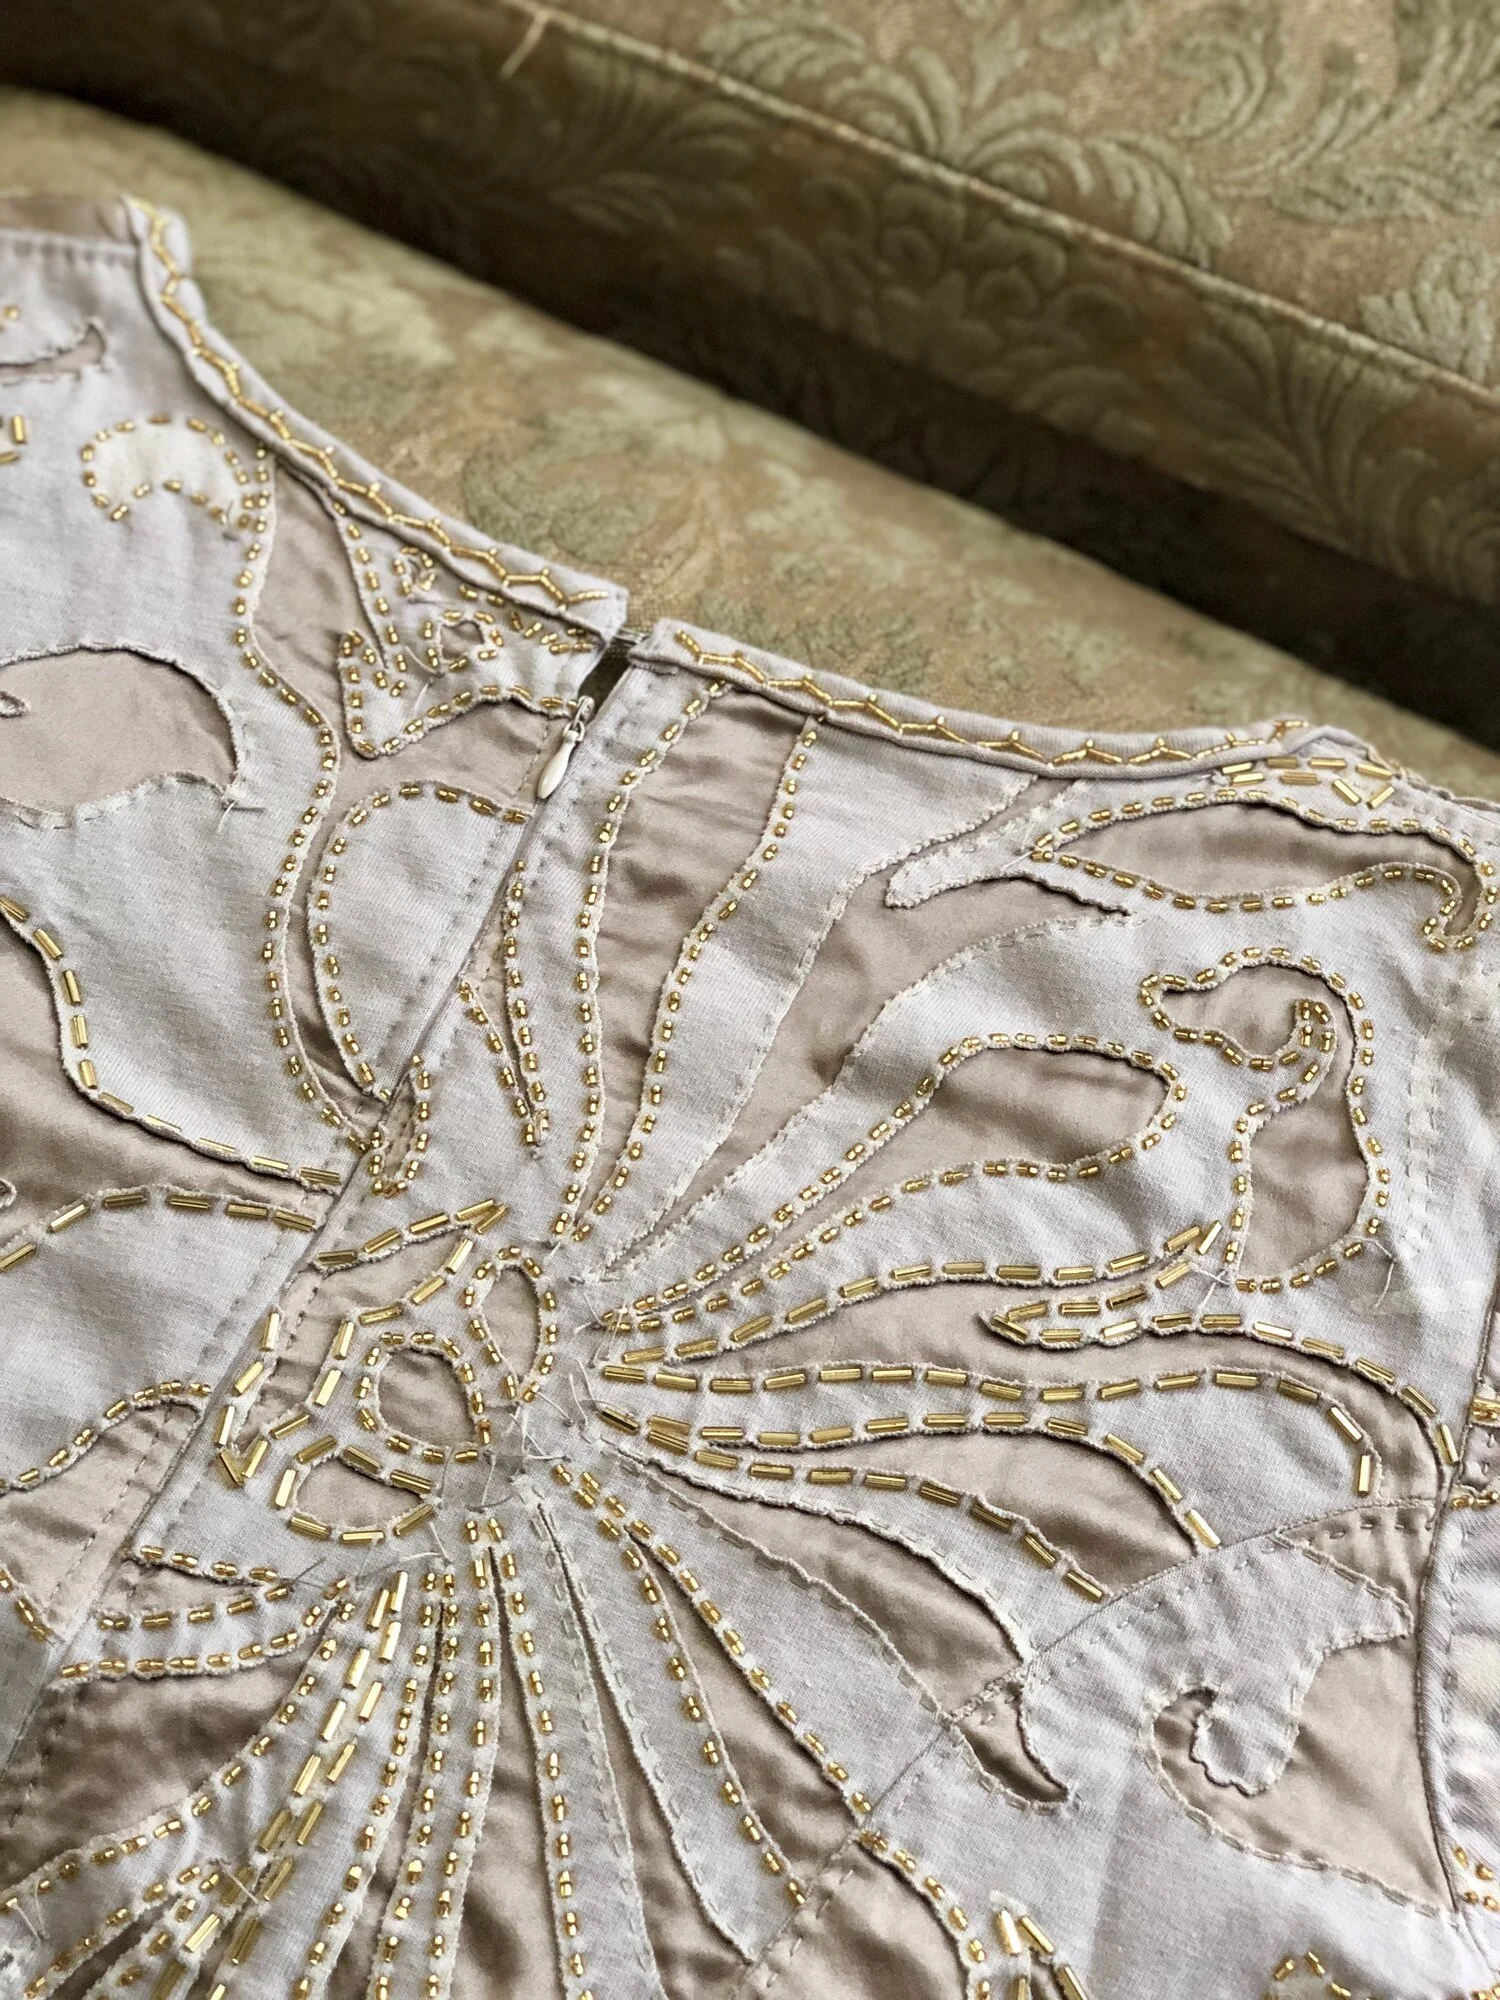
Once all the top was assembled, it was just a matter of time and patience to do the beadwork. I beaded everywhere. I beaded in bars, in coffee shops, outside and inside, at my desk, in bed, and yes, on airplanes. BEADWORK TAKES A LOT OF TIME. I think if I knew how much time it would take, I might not have started it. I may have still been beading the morning of the wedding, while getting my hair done…
Also, I thought my use of the spray adhesive to keep the layers together was pretty genius. After a section was completely beaded, I used a sponge and water to wet the area and dissolve the adhesive, which allowed me to separate them enough to cut away the top layer. I only had TWO snipping mishaps on the entire top.


Anyway… the end result was an heirloom piece I hope to repurpose for many years.
